Rainmeter for Desktop Customization
Rainmeter ‘skins’ let you customize your Windows desktop to look really cool and/or get some useful information quickly. Modern computers won’t take a noticeable hit in performance unless Rainmeter is used to do a ton of things. I wrote my own lightweight skins to help me view information I frequently need by just going to the Desktop.
How to Setup
- Download Rainmeter and install it.
- Search for ‘skins’ on Deviantart using keywords like system/calendar/notes.
- Download the ‘.rmskin’ file.
- Just double click it and it should install and open up using Rainmeter.
- Optionally download rmskin files and repeat.
- It is easy to unload a skin just by right click -> Unload skin
Rainmeter wide settings for each skin such as position on screen, enabled/disabled, transparency etc are stored here ‘C:\Users<Username>\AppData\Roaming\Rainmeter\Rainmeter.ini’
This file also contains a setting called SkinPath and this is usually ‘C:\Users<Username>\Documents\Rainmeter\Skins’. This is where each skin can be edited.
My setup
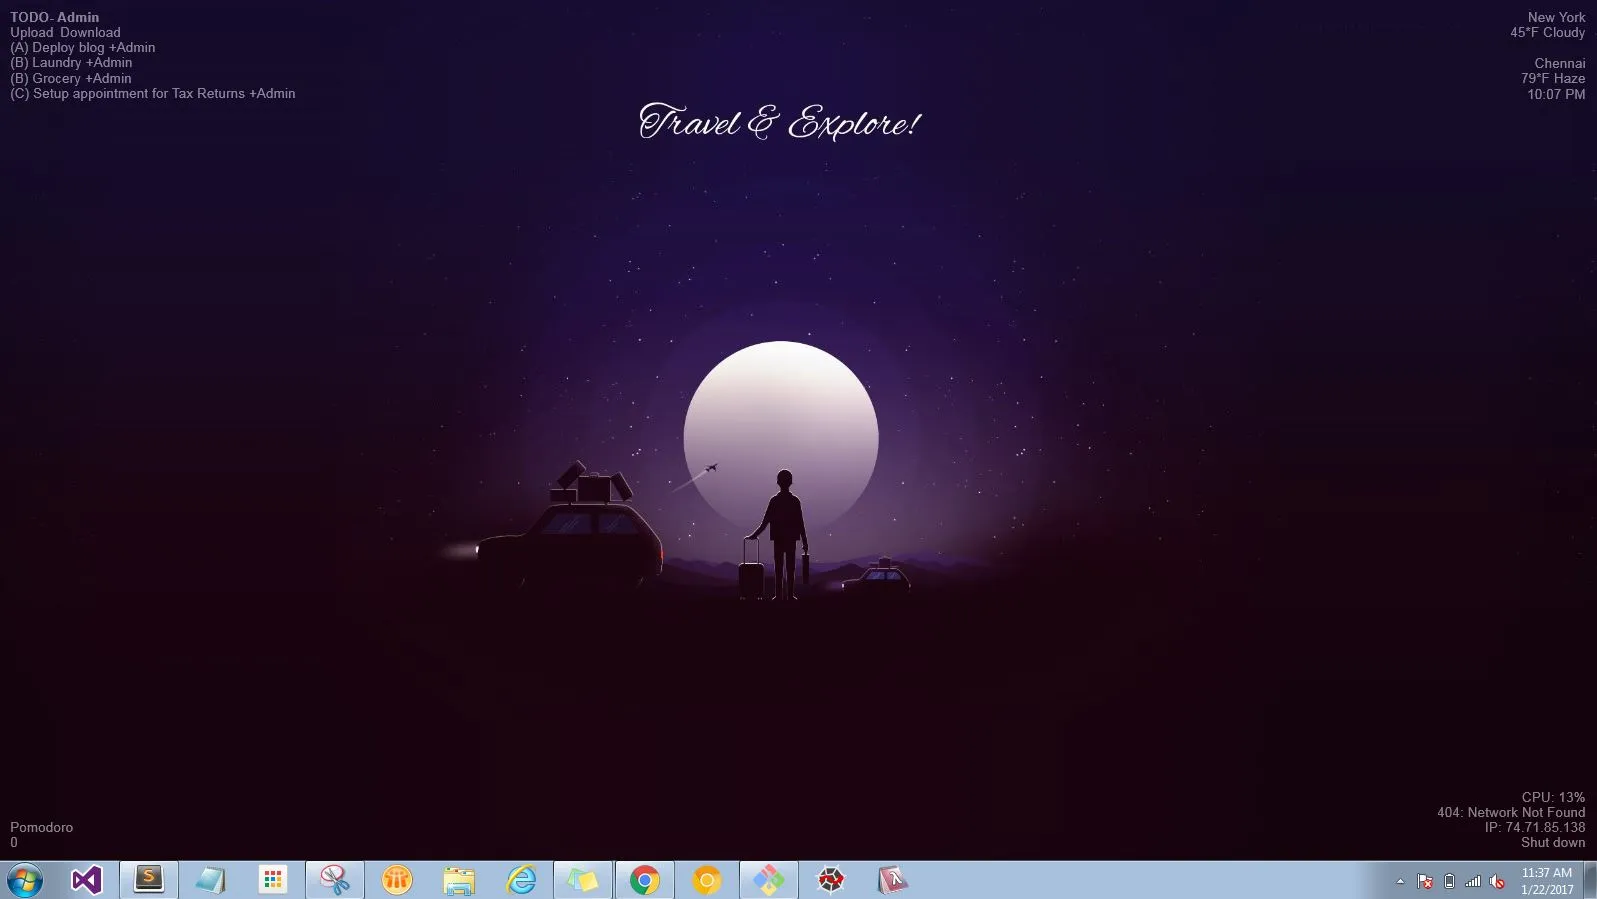
Here’s how my current setup looks like.

I have quick access to:
- my todo.txt so I never lose track of the things I need to finish for the day. Double clicking opens up todotxt.net and clicking it once cycles through my personal/work todo items. It is the same todo.txt file but I have a lua script that filters using +Work or +Admin.
- A quick Pomodoro timer.
- the WiFi network I am connected to- this is useful for me in a corporate environment where different networks affect my laptop behavior differently. Clicking CPU opens up task-manager.
- Weather and time at two places.
It is easy enough to add other things like top processes, disk space etc but I don’t need them as often.